Home
» AI Image Generator
»
How to Create Halloween Event Images With Consistent Text and Faces
How to Create Halloween Event Images With Consistent Text and Faces
The most dependable way to make a set of Halloween event images is to separate what may vary from what must stay exact. Generate or edit the atmosphere and scene; keep the approved face reference, event name, date, location, price, and call to action in a single source file. Place critical copy as editable type over the finished artwork. A model can put words in an image, but editable text gives you a straightforward way to correct one letter across every format without regenerating the scene.
This workflow works for a party flyer, ticket announcement, social carousel, or venue screen. It is especially useful when the same host appears in several images and the event information will be revised. If the design contains no recognizable real person, skip the portrait approval; if it contains no event details, the text checks can be shorter.
1. Lock the event facts and the face before you generate anything
Write a compact source of truth: official event name, approved capitalization, date with year and time zone if relevant, venue name and address, ticket URL, age restriction if applicable, and who signs off on changes. For a fictional example, call the event “Moonlit Masquerade.” Keep that spelling in one document. Do not ask an image model to invent the date, venue, sponsor, or price.
For an actual host, get permission to use a clear portrait for the intended promotion and record the approved scope. Choose a well-lit image with the face unobstructed. A second angle can help when the final layout calls for a profile pose. Store the original separately from experiments. If the host has not approved a transformed likeness, use a costumed model who has, or use a scene without a recognizable person. A descriptive prompt alone is a weak identity anchor: “woman with dark curls” can describe many different faces.
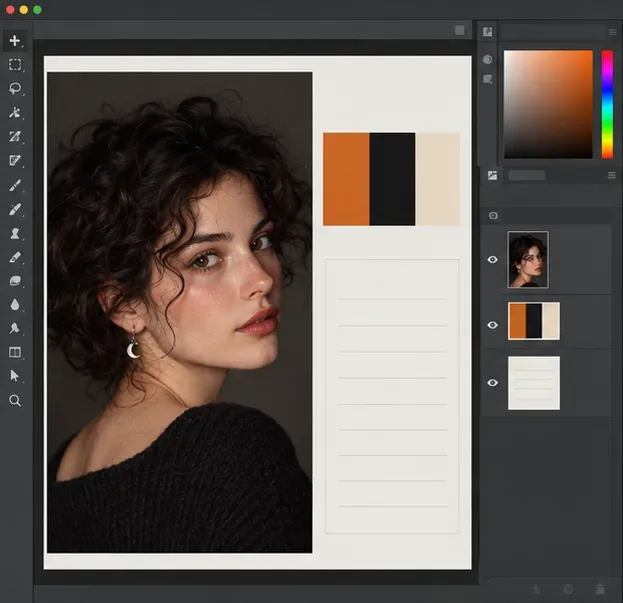
Make a short visual brief too: black, amber, and cream; candlelit courtyard; elegant rather than gory; portrait space at center; open sky for the headline. Keep a reference portrait and approved logo available for each revision. Adobe’s character-sheet and poster workflow describes using several angles of a subject and bringing character and background references together. That is a useful technique, though it does not guarantee exact likeness.
A reference portrait and small palette establish the person and visual direction before any Halloween scene is made.
2. Make a scene that leaves room for real copy
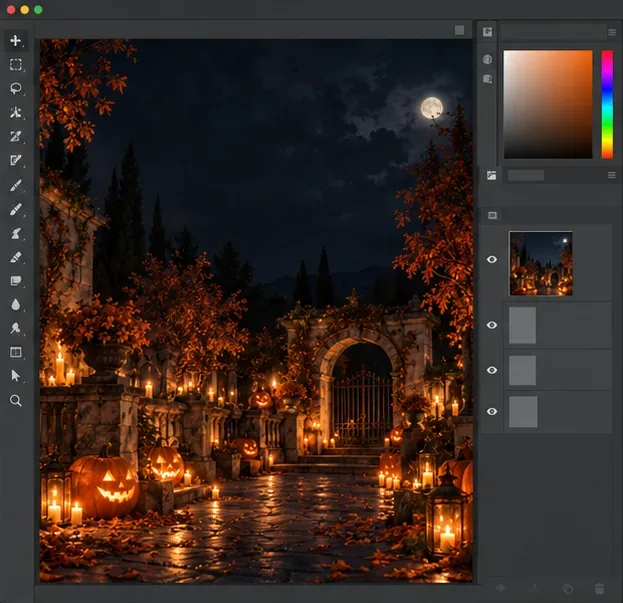
Ask for the background first. Give the generator a concrete setting, lighting, viewpoint, and empty area. For example: “A realistic autumn courtyard at night, pumpkins and lanterns along a stone path, warm candlelight, dark open sky in the upper third for a headline, no people, no signs, no letters, vertical event-poster composition.” Generate a few candidates, then choose the one with the clearest reading area. Avoid placing bright candles immediately behind where cream lettering will sit.
Reserve a separate lower region for the date, venue, and ticket details. The background should support those facts rather than force the facts into whatever space remains. Save the chosen scene as a master. For a square post or wide banner, crop or extend from that master and verify that the head, event name, and details still have room. OpenAI’s current ChatGPT Images guide describes aspect-ratio selection and editing an existing image; the exact controls vary by product and account, so use the controls available in your editor.
The scene keeps the upper sky uncluttered so the approved event title can be added as editable text.
3. Bring the subject into that scene, then compare the face
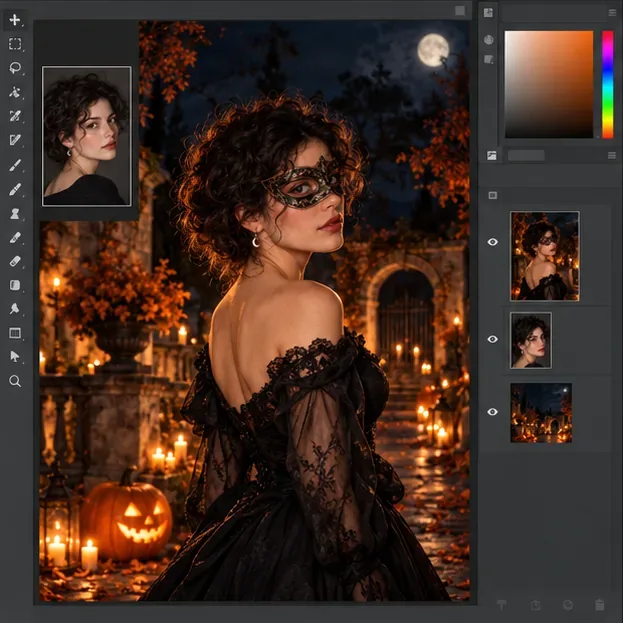
Use the approved portrait as an input reference and the selected courtyard as the scene reference or edit target. A useful instruction is: “Place this same adult person in the courtyard wearing an elegant black masquerade outfit. Preserve the recognizable facial structure, skin tone, hairstyle, and crescent earring; keep the lanterns and archway; leave the upper sky empty.” Treat these as instructions to check, not as a promise that the tool will obey perfectly. Make one targeted change at a time.
Compare the result side by side with the approved photograph at ordinary viewing size and close zoom. Look at eyes, nose, mouth, hairline, earring, hands, and any mask edge crossing the face. If a mask hides too much of the person to assess identity, move it or use an unobscured image. If the face drifts, return to the approved source and edit a smaller area, or manually composite the approved photograph into the scene. Do not keep approving increasingly altered versions merely because the last one resembles the previous generation.
In ChatGPT Images, an uploaded image can be edited with a text instruction or an area selection; OpenAI cautions that the highlighted area is not always precise and edits may reach beyond it. In Photoshop, Adobe documents a Reference Image option for Generative Fill, including controls for referencing an object or a whole image. As of its August 18, 2026 documentation update, these are ways to guide an edit, not a substitute for comparing the result with your approved portrait.
Compare the masked portrait with the source photograph before using it in a promotional design.
4. Add the title and details as editable type, then check every export
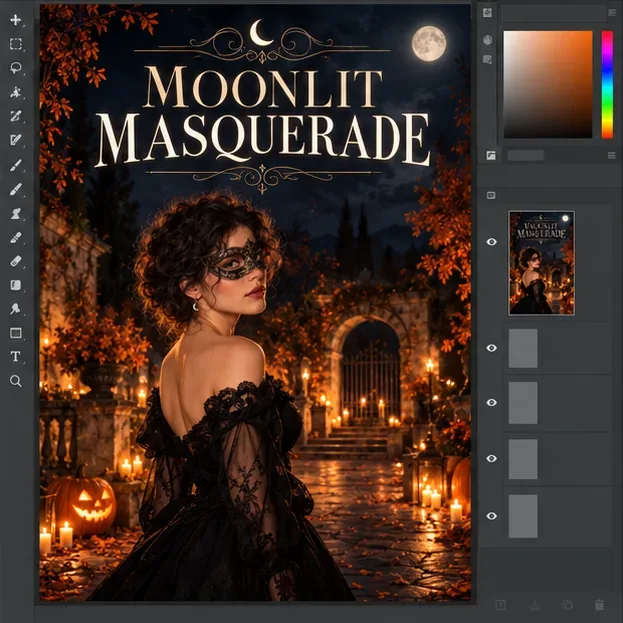
Once the image is approved, place the real event title as a text layer in a design editor. The sample below shows “MOONLIT MASQUERADE” in the upper area, but a production flyer should use the authoritative text from your event brief. Add the date, time, venue, ticket information, and logo on separate editable layers. Reuse the same locked copy and typography settings for the story, feed post, print poster, and email header. A generated title can be a visual draft; retype it when an exact spelling matters.
Read the final design at its actual use size. Check that “October 31” is not accidentally paired with the wrong weekday or year, the address and ticket destination match the organizer’s approved information, and all sponsor names are correct. Test legibility on a phone and at the intended print size. For each variation, compare the face against the same approved portrait, not against another output. Export a copy for each channel while retaining the editable master.
A short sample title sits over the dark sky; real dates, venue details, and ticket links should be added from approved copy.
What to do when something changes
Problem
Practical correction
The event date or venue changes.
Update the source brief, then replace editable text in every layout and check all exports. Keep the approved image if it still fits.
The title looks correct at first glance but has a wrong character.
Retype the title in a text layer and proof it against the brief. Do not rely on a small preview.
The host’s face changes between formats.
Return to the approved portrait and chosen master scene. Edit or crop from one verified composite rather than starting each aspect ratio from a new prompt.
A costume or prop covers the face.
Adjust that region or choose an unobstructed pose, then seek approval of the revised image.
The same asset must appear in several sizes.
Reframe the master with safe space for type; inspect every size separately for clipping and readability.
Keep a final checklist with the exact copy, the approved portrait, the chosen scene, the editable design, and the exported files. Mark each format only after a person checks the information and likeness. The workflow reduces avoidable drift, but no reference image, prompt, or editing feature guarantees identical faces or flawless lettering in every output. Where identity or wording is critical, manual design and human approval are the final controls.